【T9b】簡易ブログソフトウェアの作成 Part.Ⅱ ~ 記事関連機能の実装(9/11) プロジェクトタイプ (注意: 本文参照) プロジェクト名 T9bソリューション名 PIT9
注意 本ページの作業内容は 前のページまでの続き になっていることに注意せよ.先に前のページまでをすべて読み,指示されている作業を済ませてから本ページを読むこと. プロジェクトの作成作業については準備作業 を参照せよ. 9b-9. 記事の編集のためのアクションの修正 次に記事の編集のためのアクションであるEditアクションとそのビューを見直そう.
デフォルトではCreateアクションと同様に,ユーザーIDのリストをViewDataに保存する余計な処理をしているので,
これを取り除いておこう.また,記事の編集の際,ログイン中のユーザーの所有物ではない記事を編集しようとしている場合は
これを拒否する必要がある.これらのためにGETおよびPOST用のEditアクションを各々_ ,
_ に示すように修正しよう.
Articlesコントローラーの修正内容(Editアクション(GET用)) 1
2
3
4
5
6
7
8
9
10
11
12
13
14
15
16
17
18
19
20
21
22
// GET: Articles/Edit/5
[Authorize]
public async Task < IActionResult > Edit ( int? id )
{
if ( id == null )
{
return NotFound ();
}
var article = await _context . Articles . FindAsync ( id );
if ( article == null )
{
return NotFound ();
}
// ViewData["BlogUserId"] = new SelectList(_context.Users, "Id", "Id", article.BlogUserId); // ←削除
// ログイン中のユーザー情報を取得して編集可能かどうかを調べる.
BlogUser ? currentUser = await _userManager . GetUserAsync ( User );
if (! await IsModifiableAsync ( currentUser , article )) return Forbid ();
return View ( article );
}
Articlesコントローラーの修正内容(Editアクション(POST用) 1
2
3
4
5
6
7
8
9
10
11
12
13
14
15
16
17
18
19
20
21
22
23
24
25
26
27
28
29
30
31
32
33
34
35
36
37
38
39
40
41
42
// POST: Articles/Edit/5
// To protect from overposting attacks, enable the specific properties you want to bind to.
// For more details, see http://go.microsoft.com/fwlink/?LinkId=317598.
[Authorize]
[HttpPost]
[ValidateAntiForgeryToken]
public async Task < IActionResult > Edit ( int id , [ Bind ( "ArticleId,Title,Body,Created,Modified,PublicationState,BlogUserId" )] Article article )
{
if ( id != article . ArticleId )
{
return NotFound ();
}
// ログイン中のユーザー情報を取得して編集可能かどうかを調べる.
BlogUser ? currentUser = await _userManager . GetUserAsync ( User );
if (! await IsModifiableAsync ( currentUser , article )) return Forbid ();
if ( ModelState . IsValid )
{
try
{
article . Modified = DateTime . Now ; // 更新日時をセットする.
_context . Update ( article );
await _context . SaveChangesAsync ();
}
catch ( DbUpdateConcurrencyException )
{
if (! ArticleExists ( article . ArticleId ))
{
return NotFound ();
}
else
{
throw ;
}
}
return RedirectToAction ( nameof ( Details ), new { id = article . ArticleId }); // 編集が成功したら Details アクションに戻す
}
// ViewData["BlogUserId"] = new SelectList(_context.Users, "Id", "Id", article.BlogUserId); // ←削除
return View ( article );
}
Editアクションにはログイン済みのユーザーにしかアクセスできないようにするため,GET用とPOST用のアクションメソッドの
両方とも[Authorize]属性を付加している._ の17~19行目,_ の14~16行目では
Detailsアクションと同様にリスト9b-5-2 で定義したIsModifiableAsync()メソッドを使用して
その記事がそのユーザーにとって削除・編集可能であるかを判定して,可能でなければForbid()メソッドを呼び出して
アクセスを拒否している.
このEditアクションのためのビューも変更しておこう.
Views/Articles/Edit.cshtml を_ に示すように変更しよう.
Views/Articles/Edit.cshtmlの内容 1
2
3
4
5
6
7
8
9
10
11
12
13
14
15
16
17
18
19
20
21
22
23
24
25
26
27
28
29
30
31
32
33
34
35
36
37
38
39
@model T9b.Models.Article
@{
ViewData["Title"] = "記事編集";
if (Model is null) throw new ArgumentNullException(nameof(Model)); // ad-hoc! 非null保証のための回避策
}
< form asp-action = "Edit" >
@* タイトル(Title)のための入力欄*@
< label asp-for = "@Model.Title" ></ label > :
< input asp-for = "@Model.Title" />
< br />
@* 本文(Body)のための入力欄*@
< label asp-for = "@Model.Body" ></ label > :< br />
< textarea asp-for = "@Model.Body" rows = "10" cols = "70" ></ textarea >
< br />
@* 公開状態(PublicationState)のための入力欄*@
< label asp-for = "@Model.PublicationState" ></ label > :
< select asp-for = "@Model.PublicationState" asp-items = "Html.GetEnumSelectList<PublicationStateType>()" ></ select >
< br />
@* その他の情報を隠しパラメータとして埋め込んでおく *@
< input type = "hidden" asp-for = "@Model.ArticleId" />
< input type = "hidden" asp-for = "@Model.Created" />
< input type = "hidden" asp-for = "@Model.BlogUserId" />
< input type = "submit" value = "修正" />
< div asp-validation-summary = "All" ></ div >
</ form >
< a asp-action = "Details" asp-route-id = "@Model.ArticleId" > 詳細に戻る</ a >
@section Scripts
{
@{ await Html.RenderPartialAsync("_ValidationScriptsPartial");}
}
ここまで書けたら実行してみよう.プロジェクトを起動して「ログイン」のリンクをクリックし適当な通常ユーザー
(admin以外のユーザー)としてログインしてする「全記事一覧」のリンクをたどる.
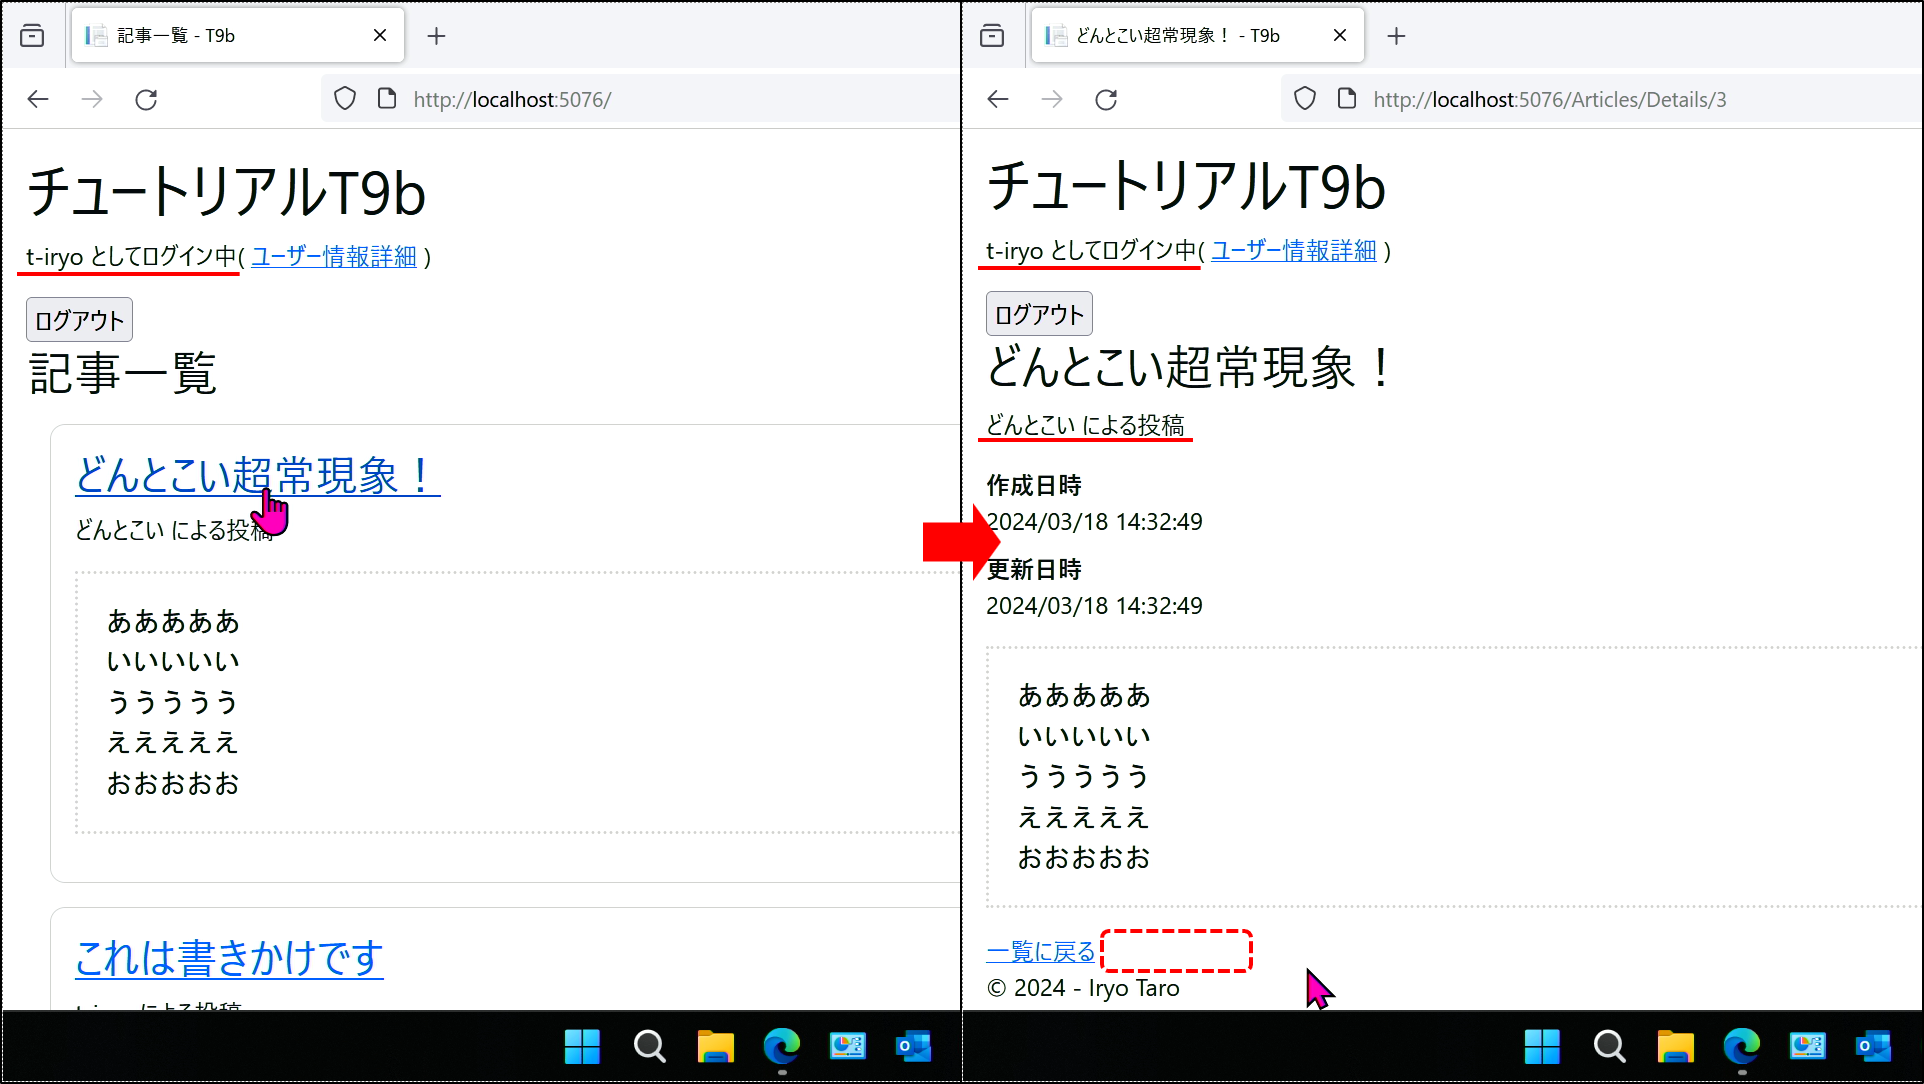
既にログイン済みであれば記事一覧画面が表示されているはずである.ここで 自分以外のユーザーが作成した 記事のタイトル部分のリンクをクリックする.
すると記事の個別表示画面(Details)が表示されることが分かるはずである(_ ).
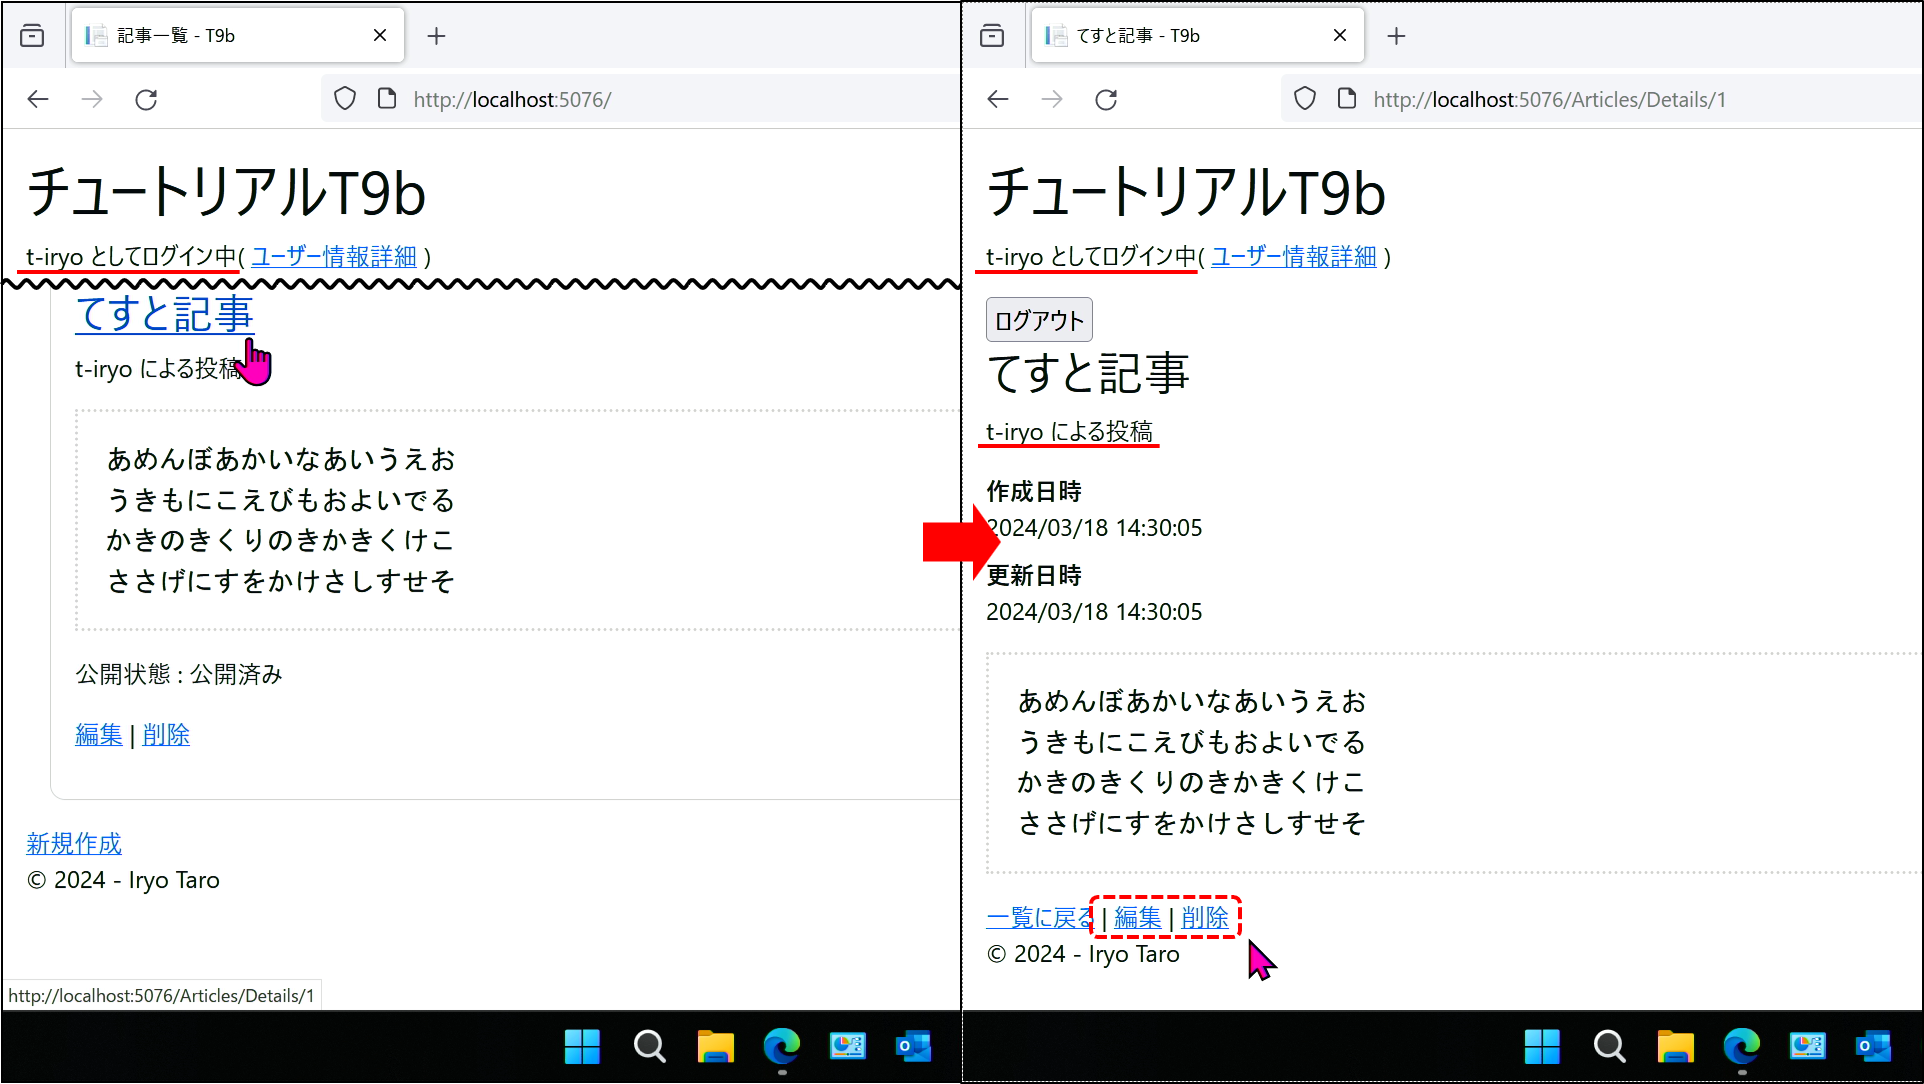
記事一覧に戻り, 自分で作成した 記事のタイトル部分のリンクをクリックしてみよう.
同じく記事の個別表示画面(Details)が表示されるが,「編集」と「削除」のリンクが表示されていることが分かるはずである(_ ).
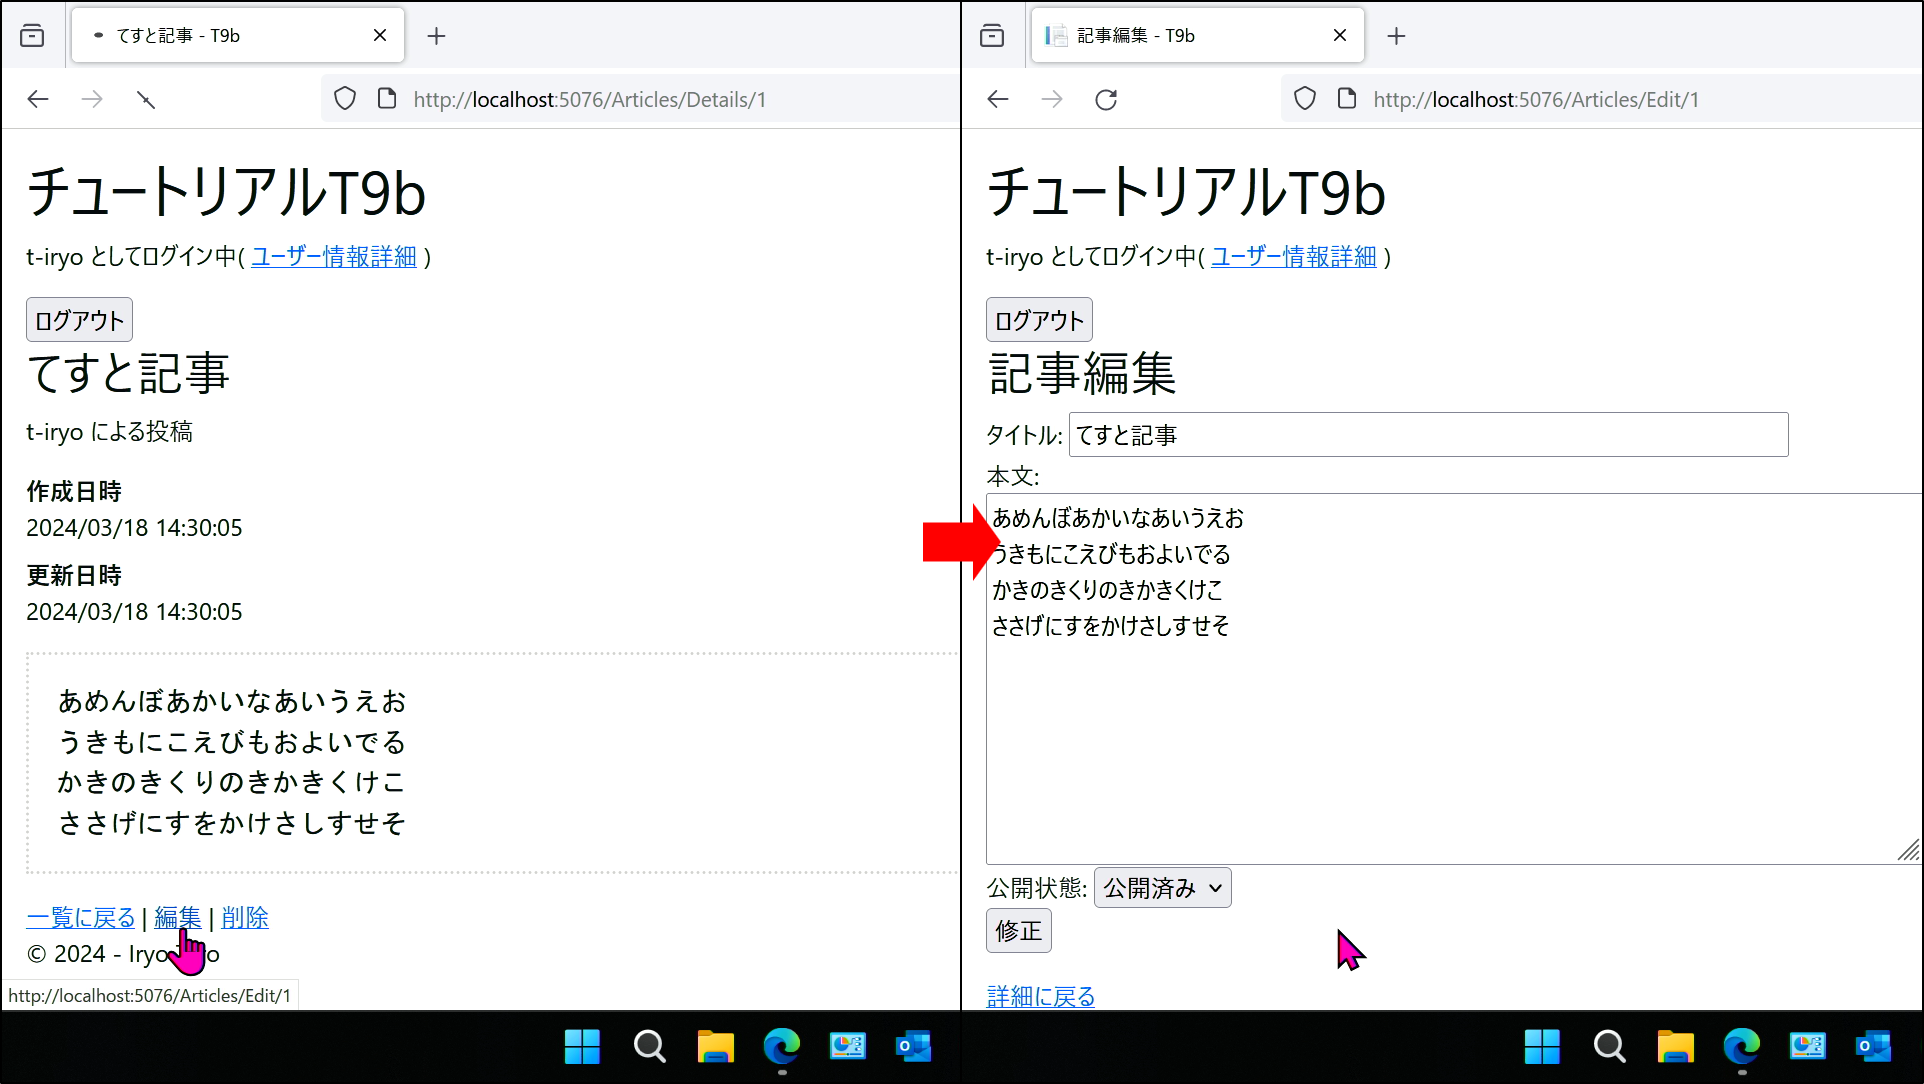
この状態で「編集」のリンクをクリックしてみよう.記事編集画面(Edit)が表示されるはずである(_ ).
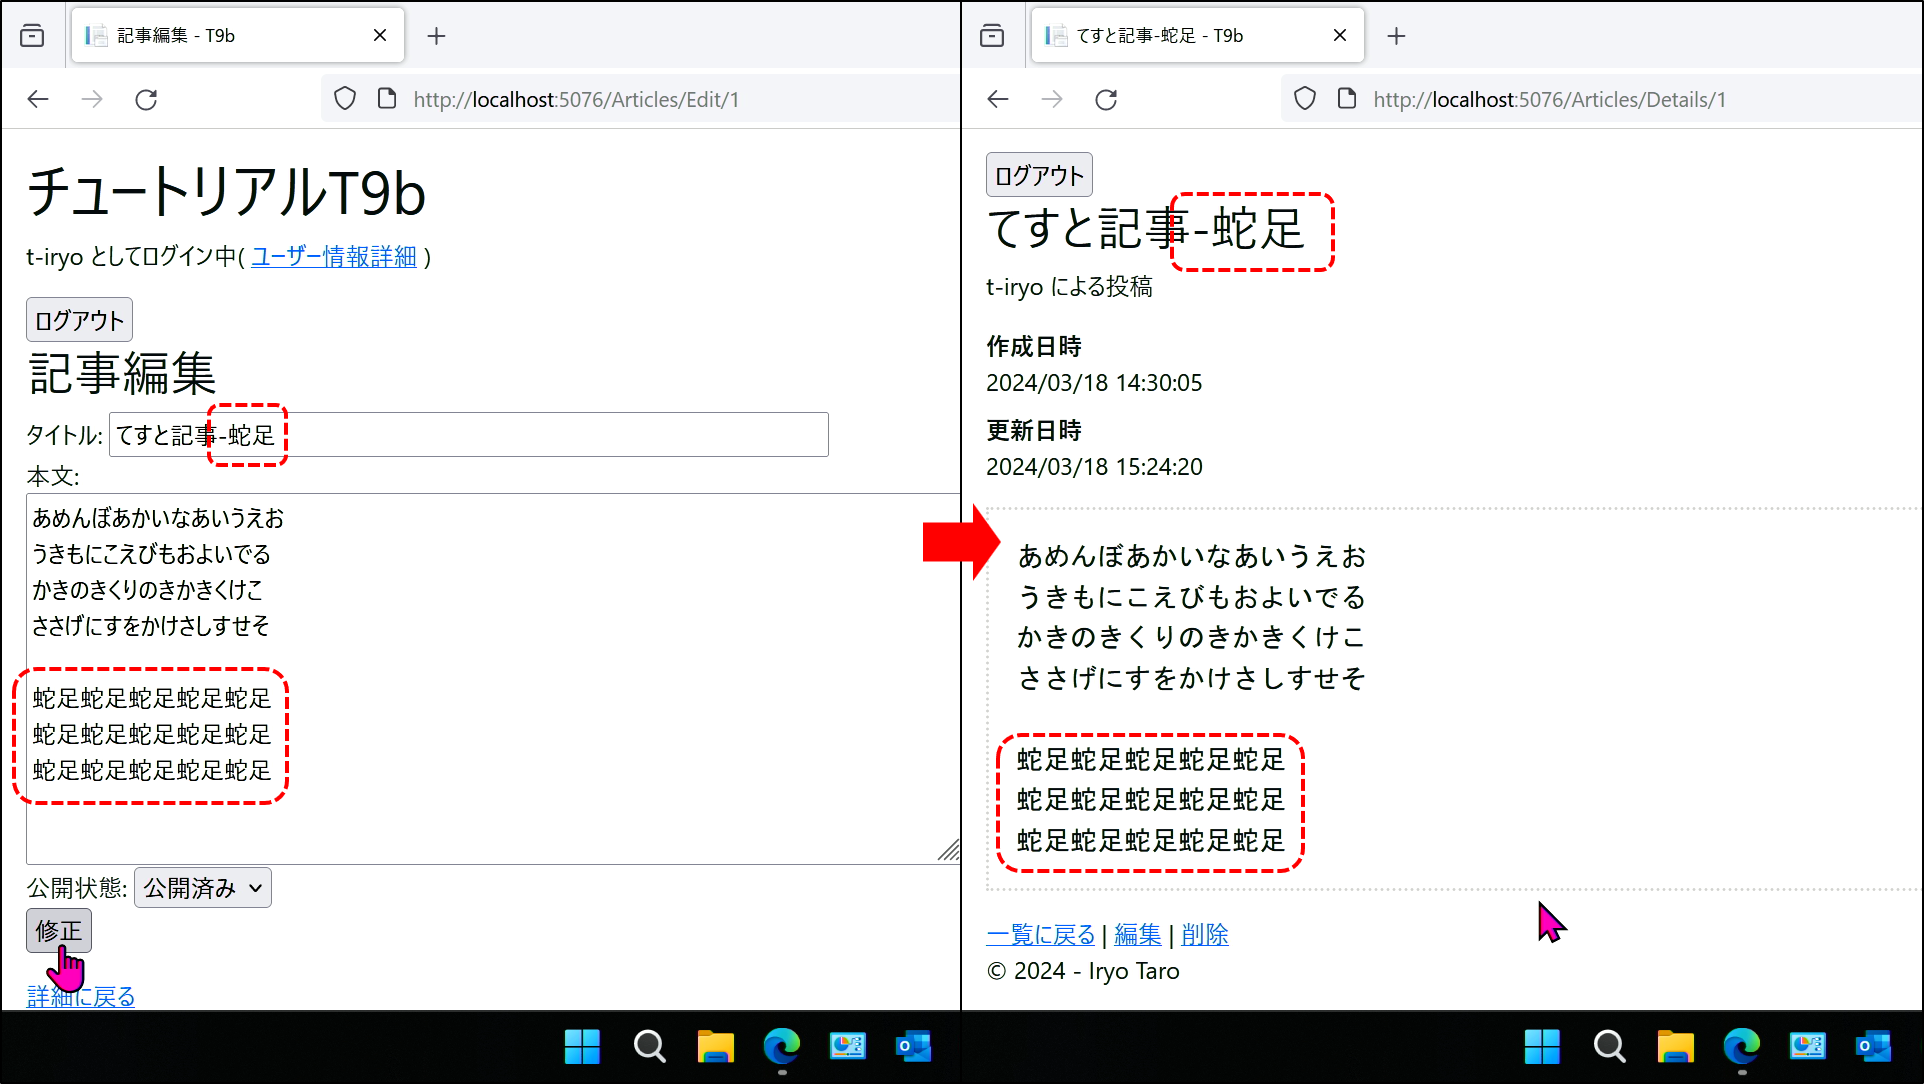
タイトルと本文を適当に編集して「修正」ボタンをクリックしてみよう.記事の個別表示画面(Details)に遷移して
編集した内容が反映されているのが分かるはずである(_ ).
実行結果 Last updated on 2024-06-19